What is Cherry Studio?
Cherry Studio is a cross-platform AI chat client for Windows, macOS, and Linux. It unifies 300+ mainstream models—including cloud providers such as OpenAI, Claude, and Gemini—and also supports local deployments via Ollama and LM Studio. Beyond conversational assistance, Cherry Studio offers powerful Agent capabilities that can reason, plan, and act autonomously. Give an Agent a goal and it will break down tasks, call tools, and execute steps while you retain full control.Features
Seamless Model Switching
Swap between OpenAI, Claude, Gemini, and local Ollama/LM Studio models with context preserved so conversations stay uninterrupted.
300+ Smart Assistants
Access a library of 300+ preset expert personas for writing, coding, translation, study guidance, and more.
Intelligent Document Handling
Drag-and-drop PDFs, Markdown files, or slides and let AI extract structure, key concepts, and answers in seconds.
Productivity Integrations
Integrate to-do lists, reminders, knowledge bases, and code snippets so Agents can automate workflows end-to-end.
Personalized Experience
Customize system prompts, memory, plugins, and UI themes to match team processes or personal preferences.
Robust Extensibility
Connect proprietary data sources or workflows through the plugin marketplace and open API so Agents can call databases or web services.
Step 1: Installation
Download Cherry Studio: https://www.cherry-ai.com/downloadStep 2: Add AGCloud Provider Configuration
2.1 Configure OpenAI and Google Providers
Some Claude models do not support the OpenAI-compatible format, so keep them on the dedicated Anthropic connector described in section 2.2. For OpenAI-compatible providers, follow the steps below. 2.1.1 Open Provider Settings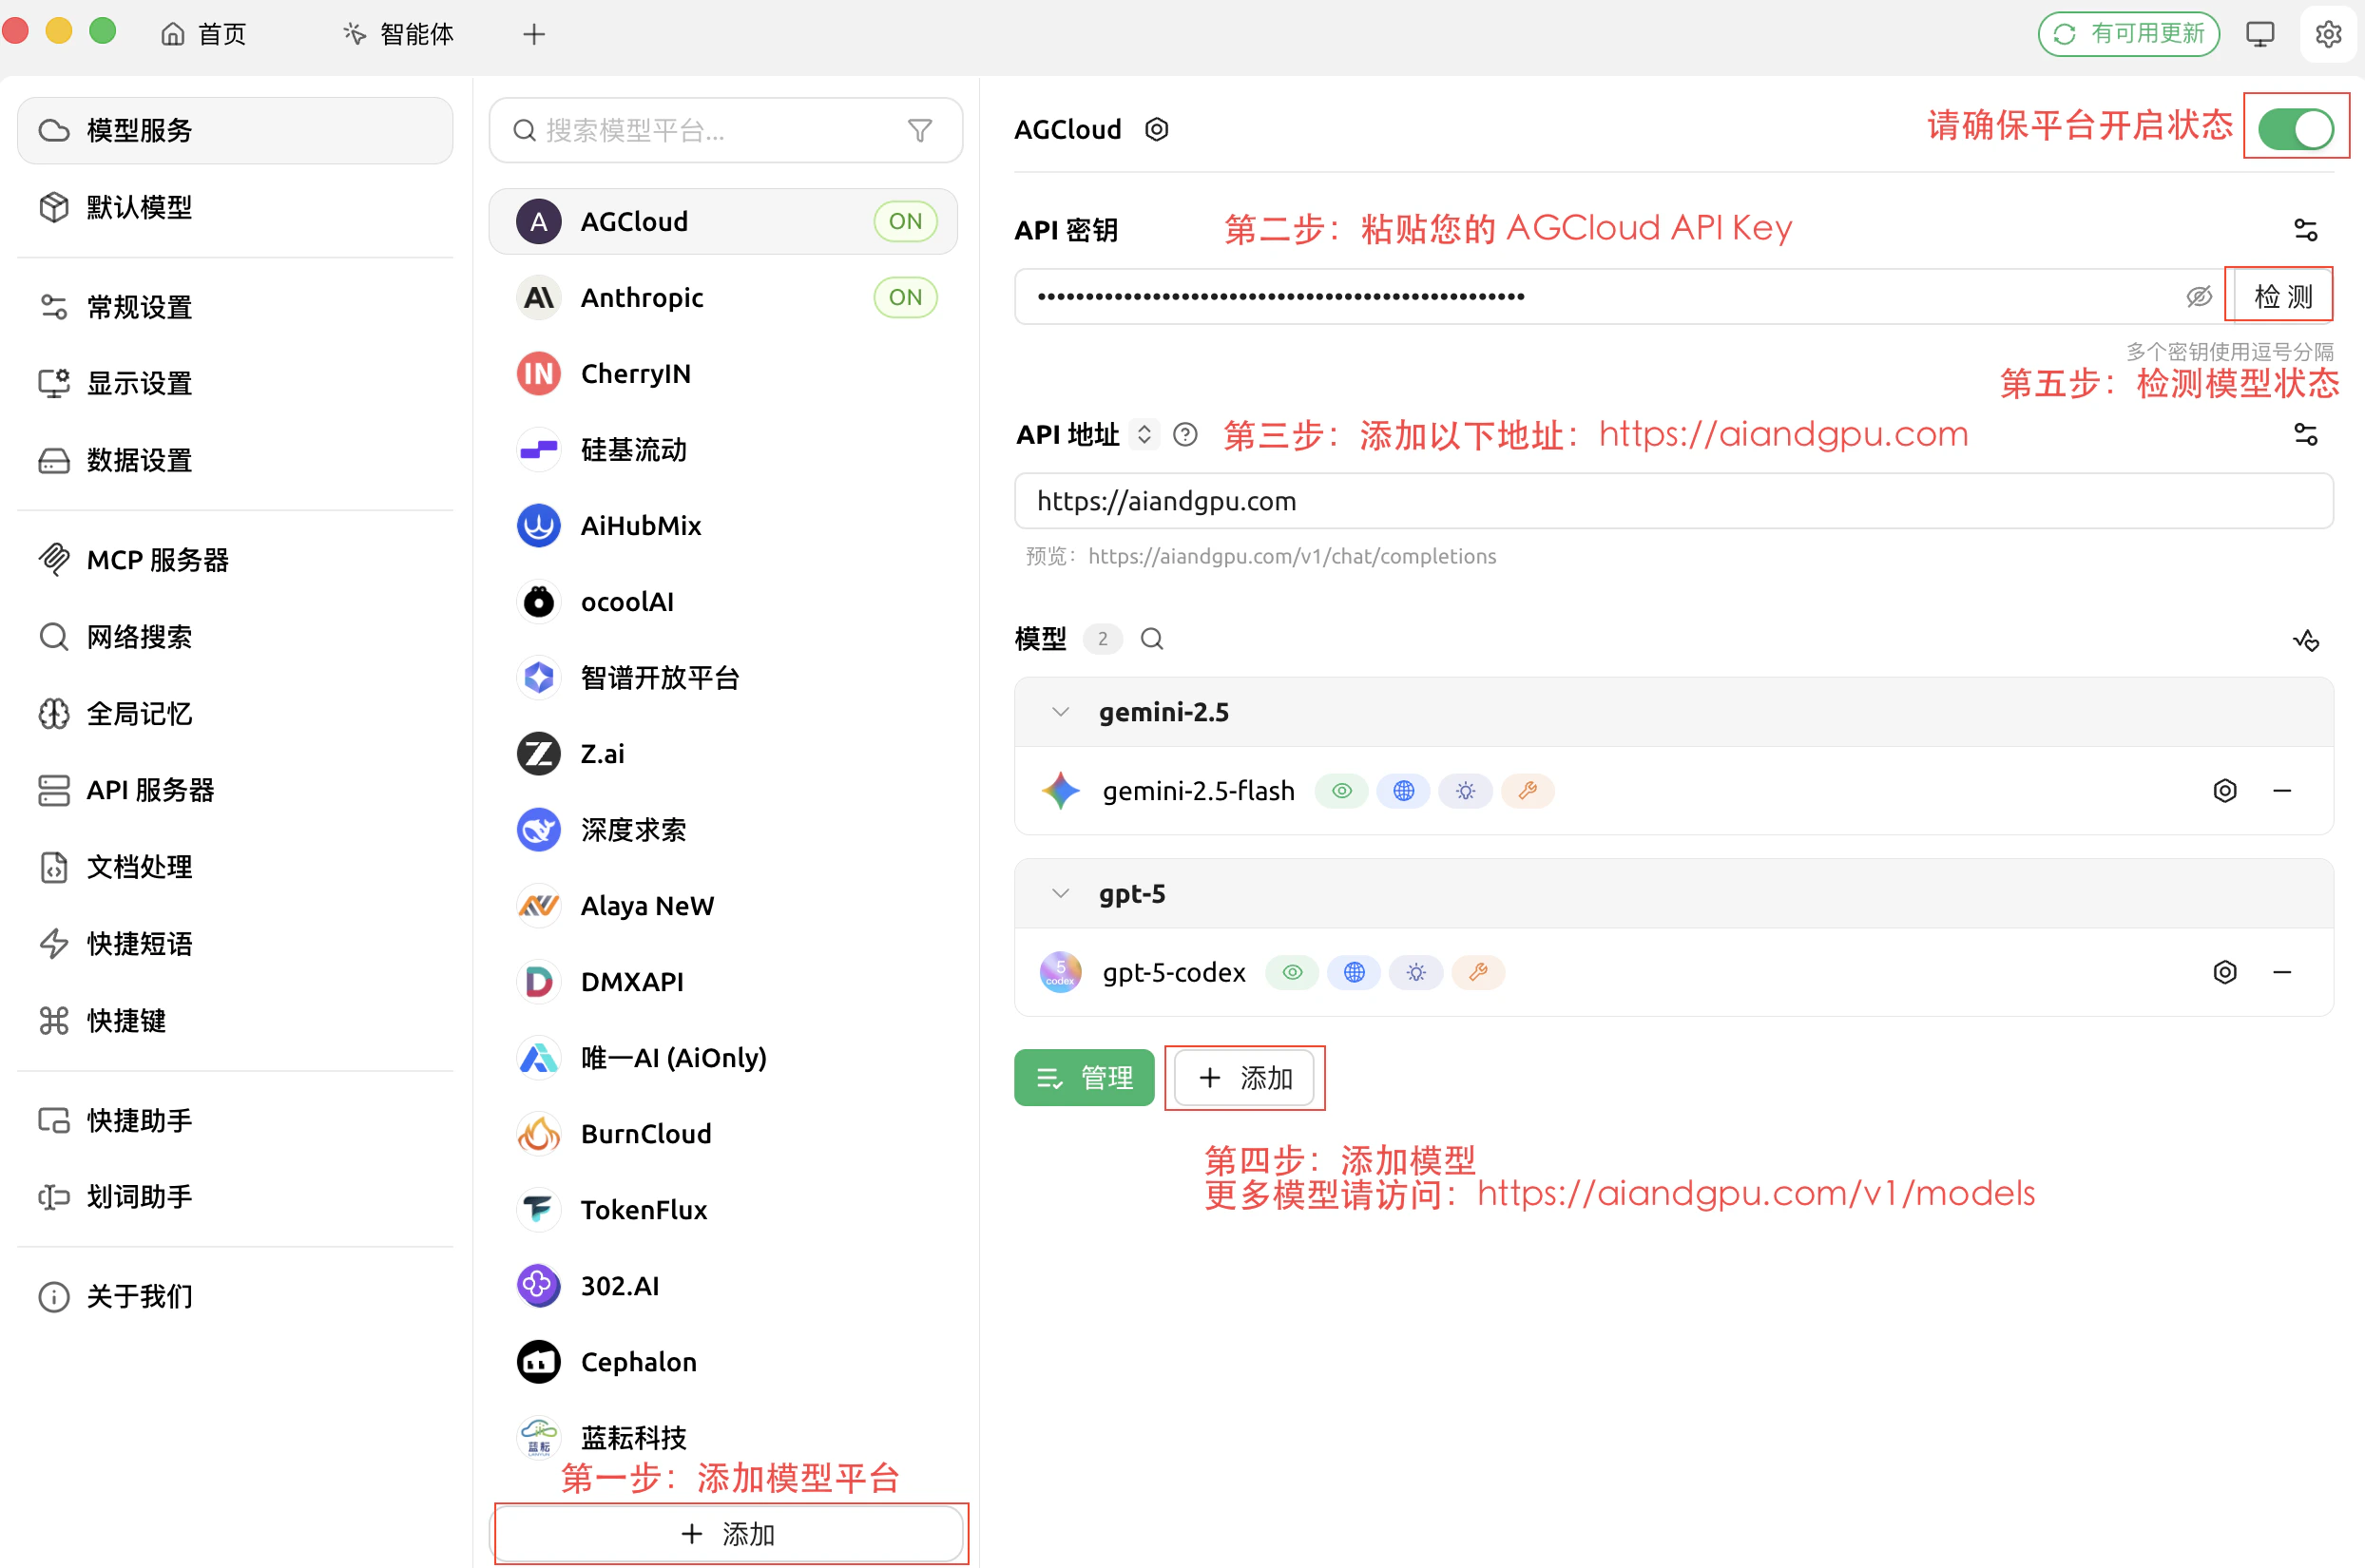
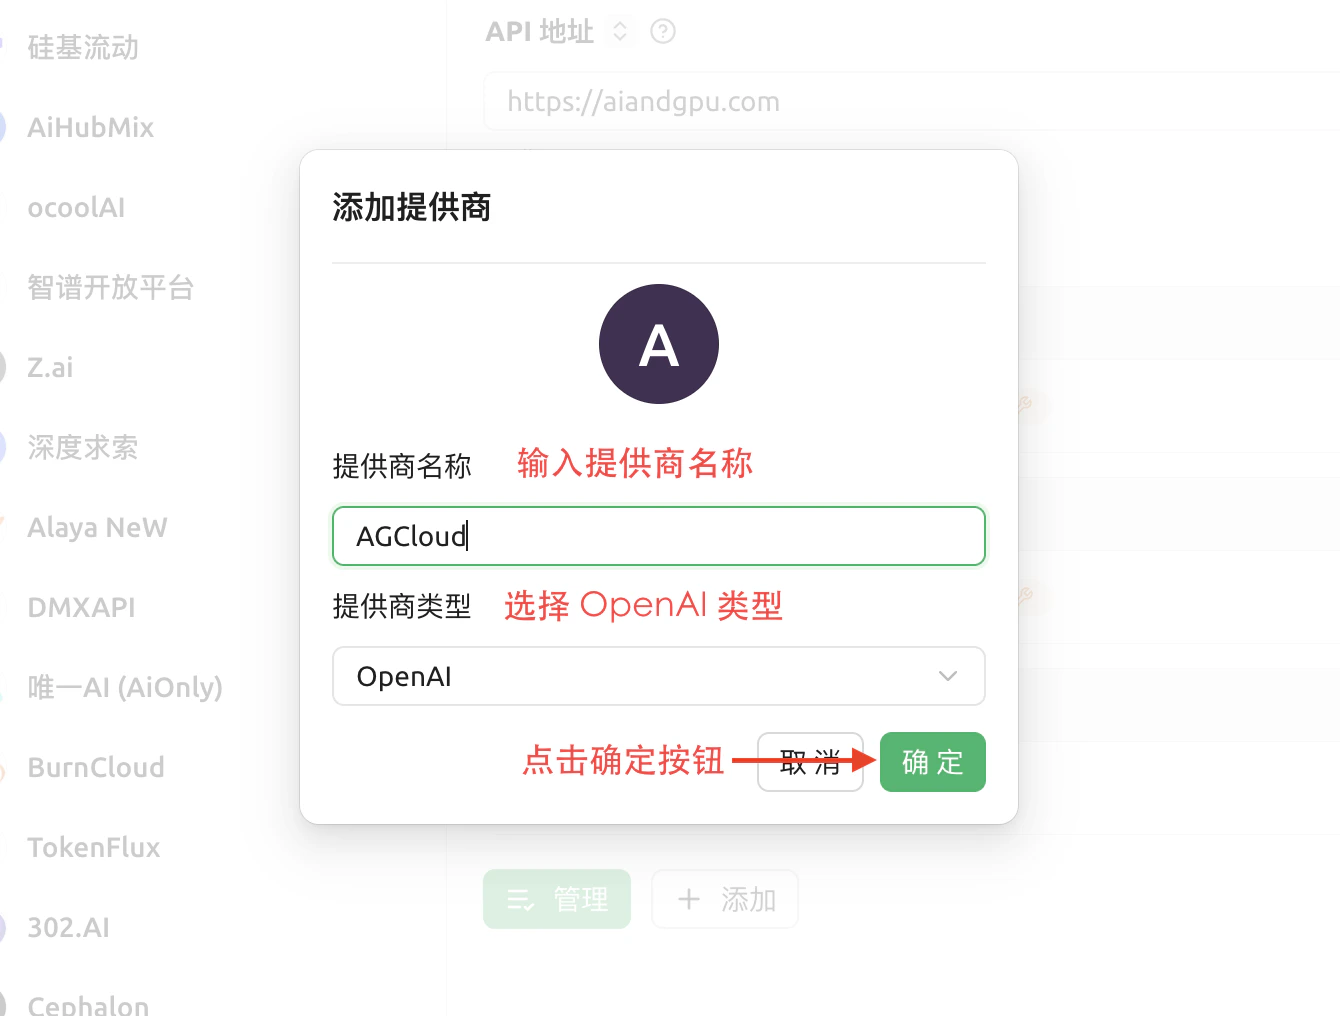
- Press the + button, give the connector a name such as “AGCloud OpenAI,” and paste your AGCloud API key. Confirm the default base URL if prompted.
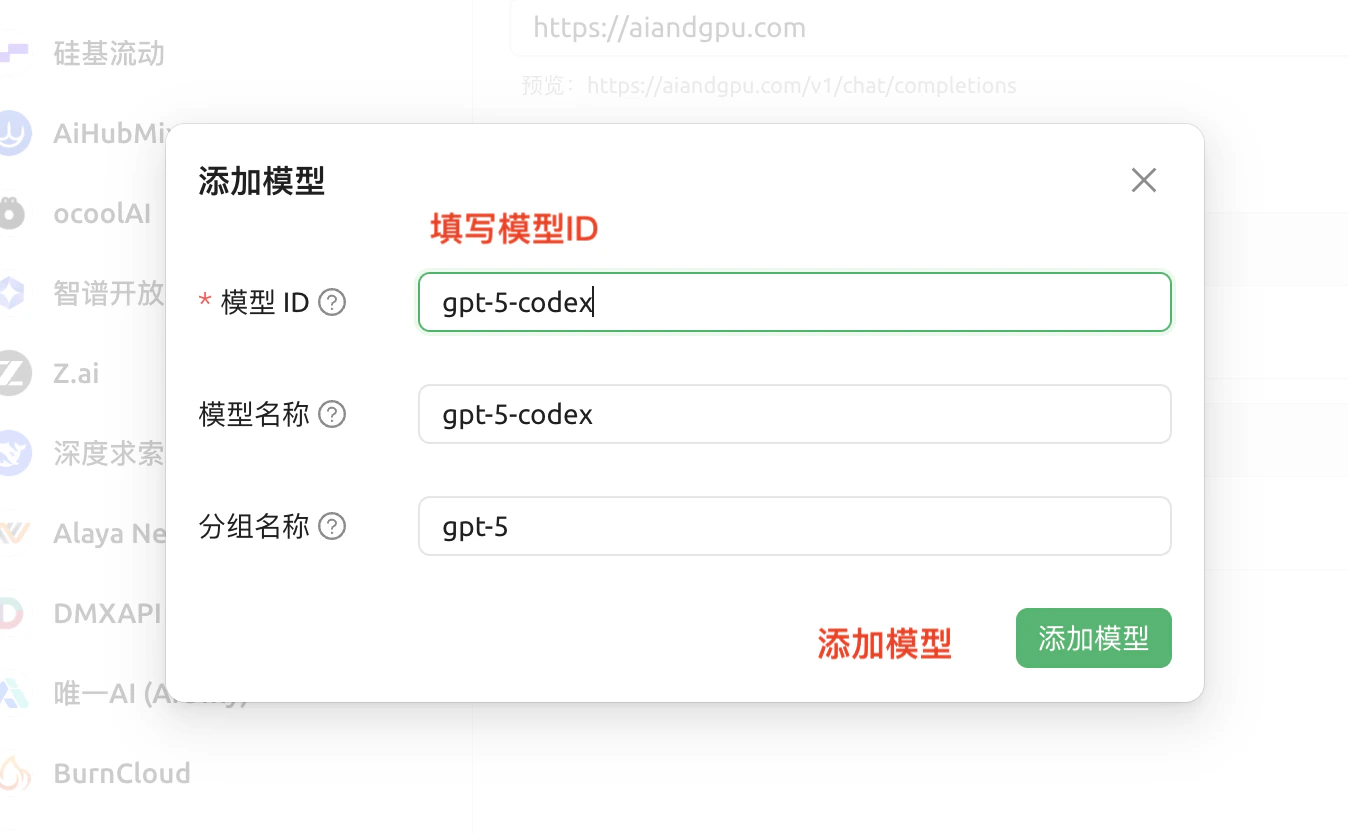
- In Model Management → Add Model, enter the exact model identifier published by AGCloud (for example
gpt-5-chat-latest) and click Save.
2.2 Configure Anthropic Provider
Aside from the initial provider creation, the remaining steps match section 2.1.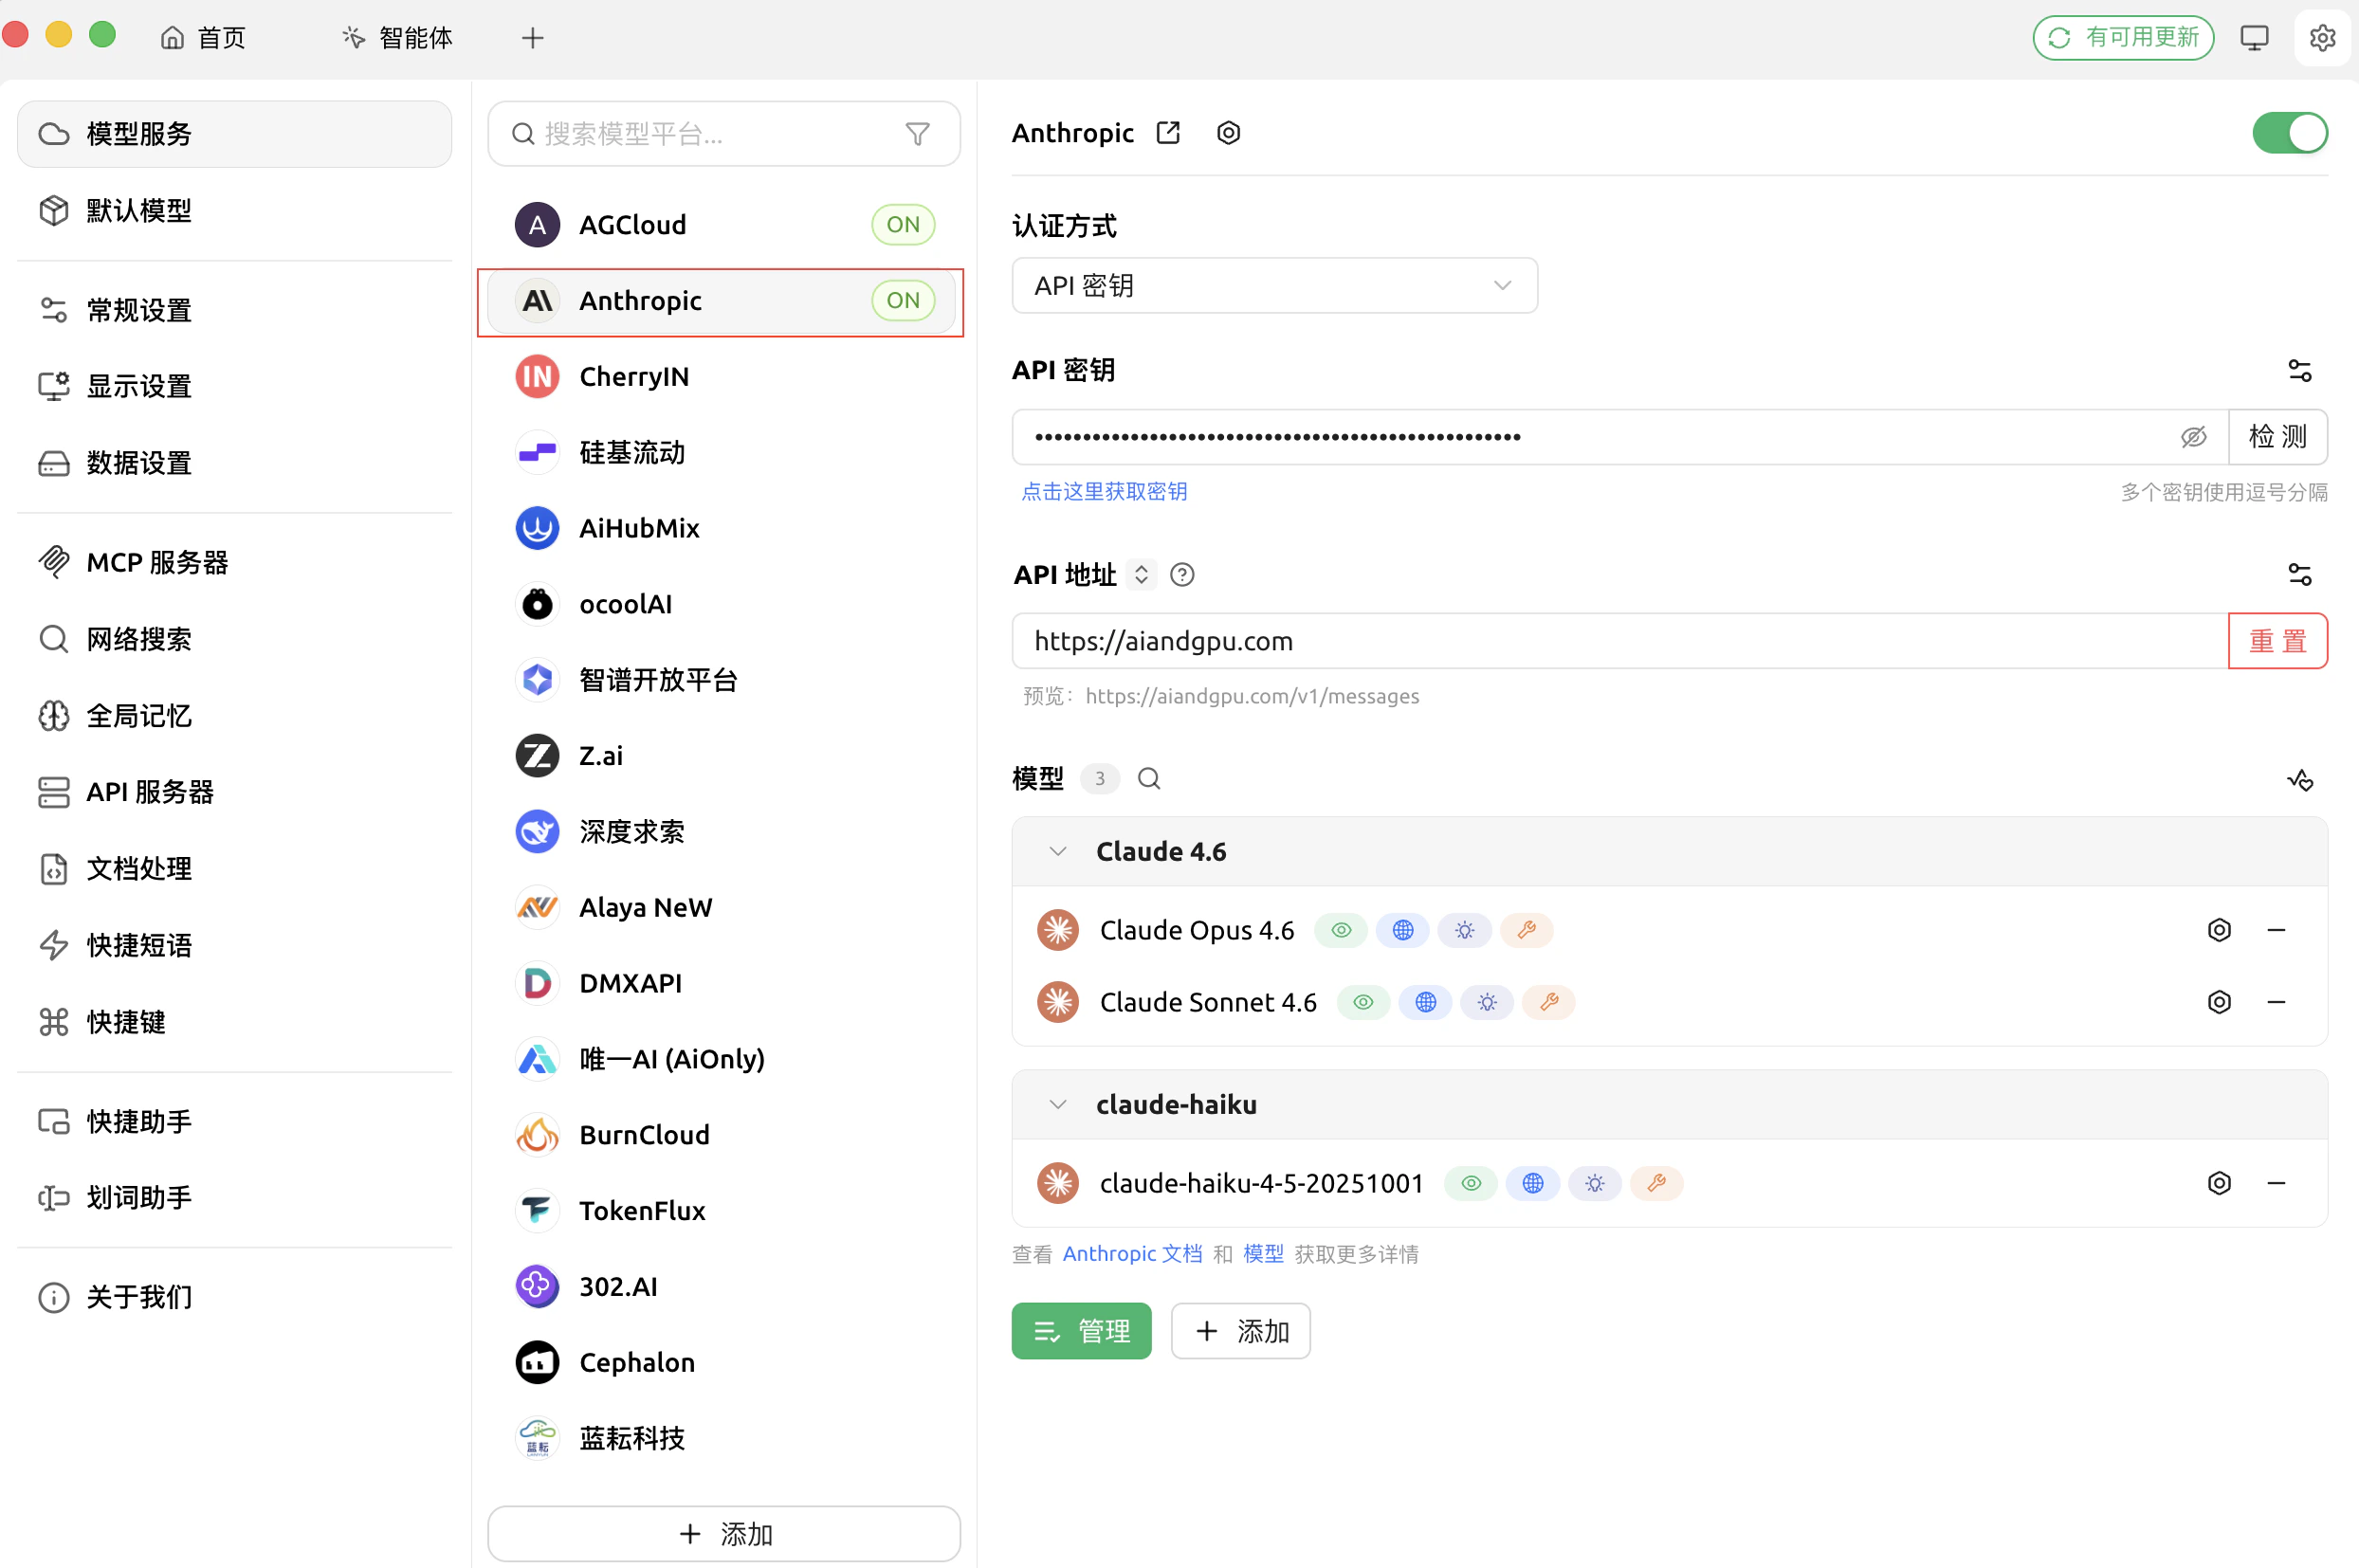
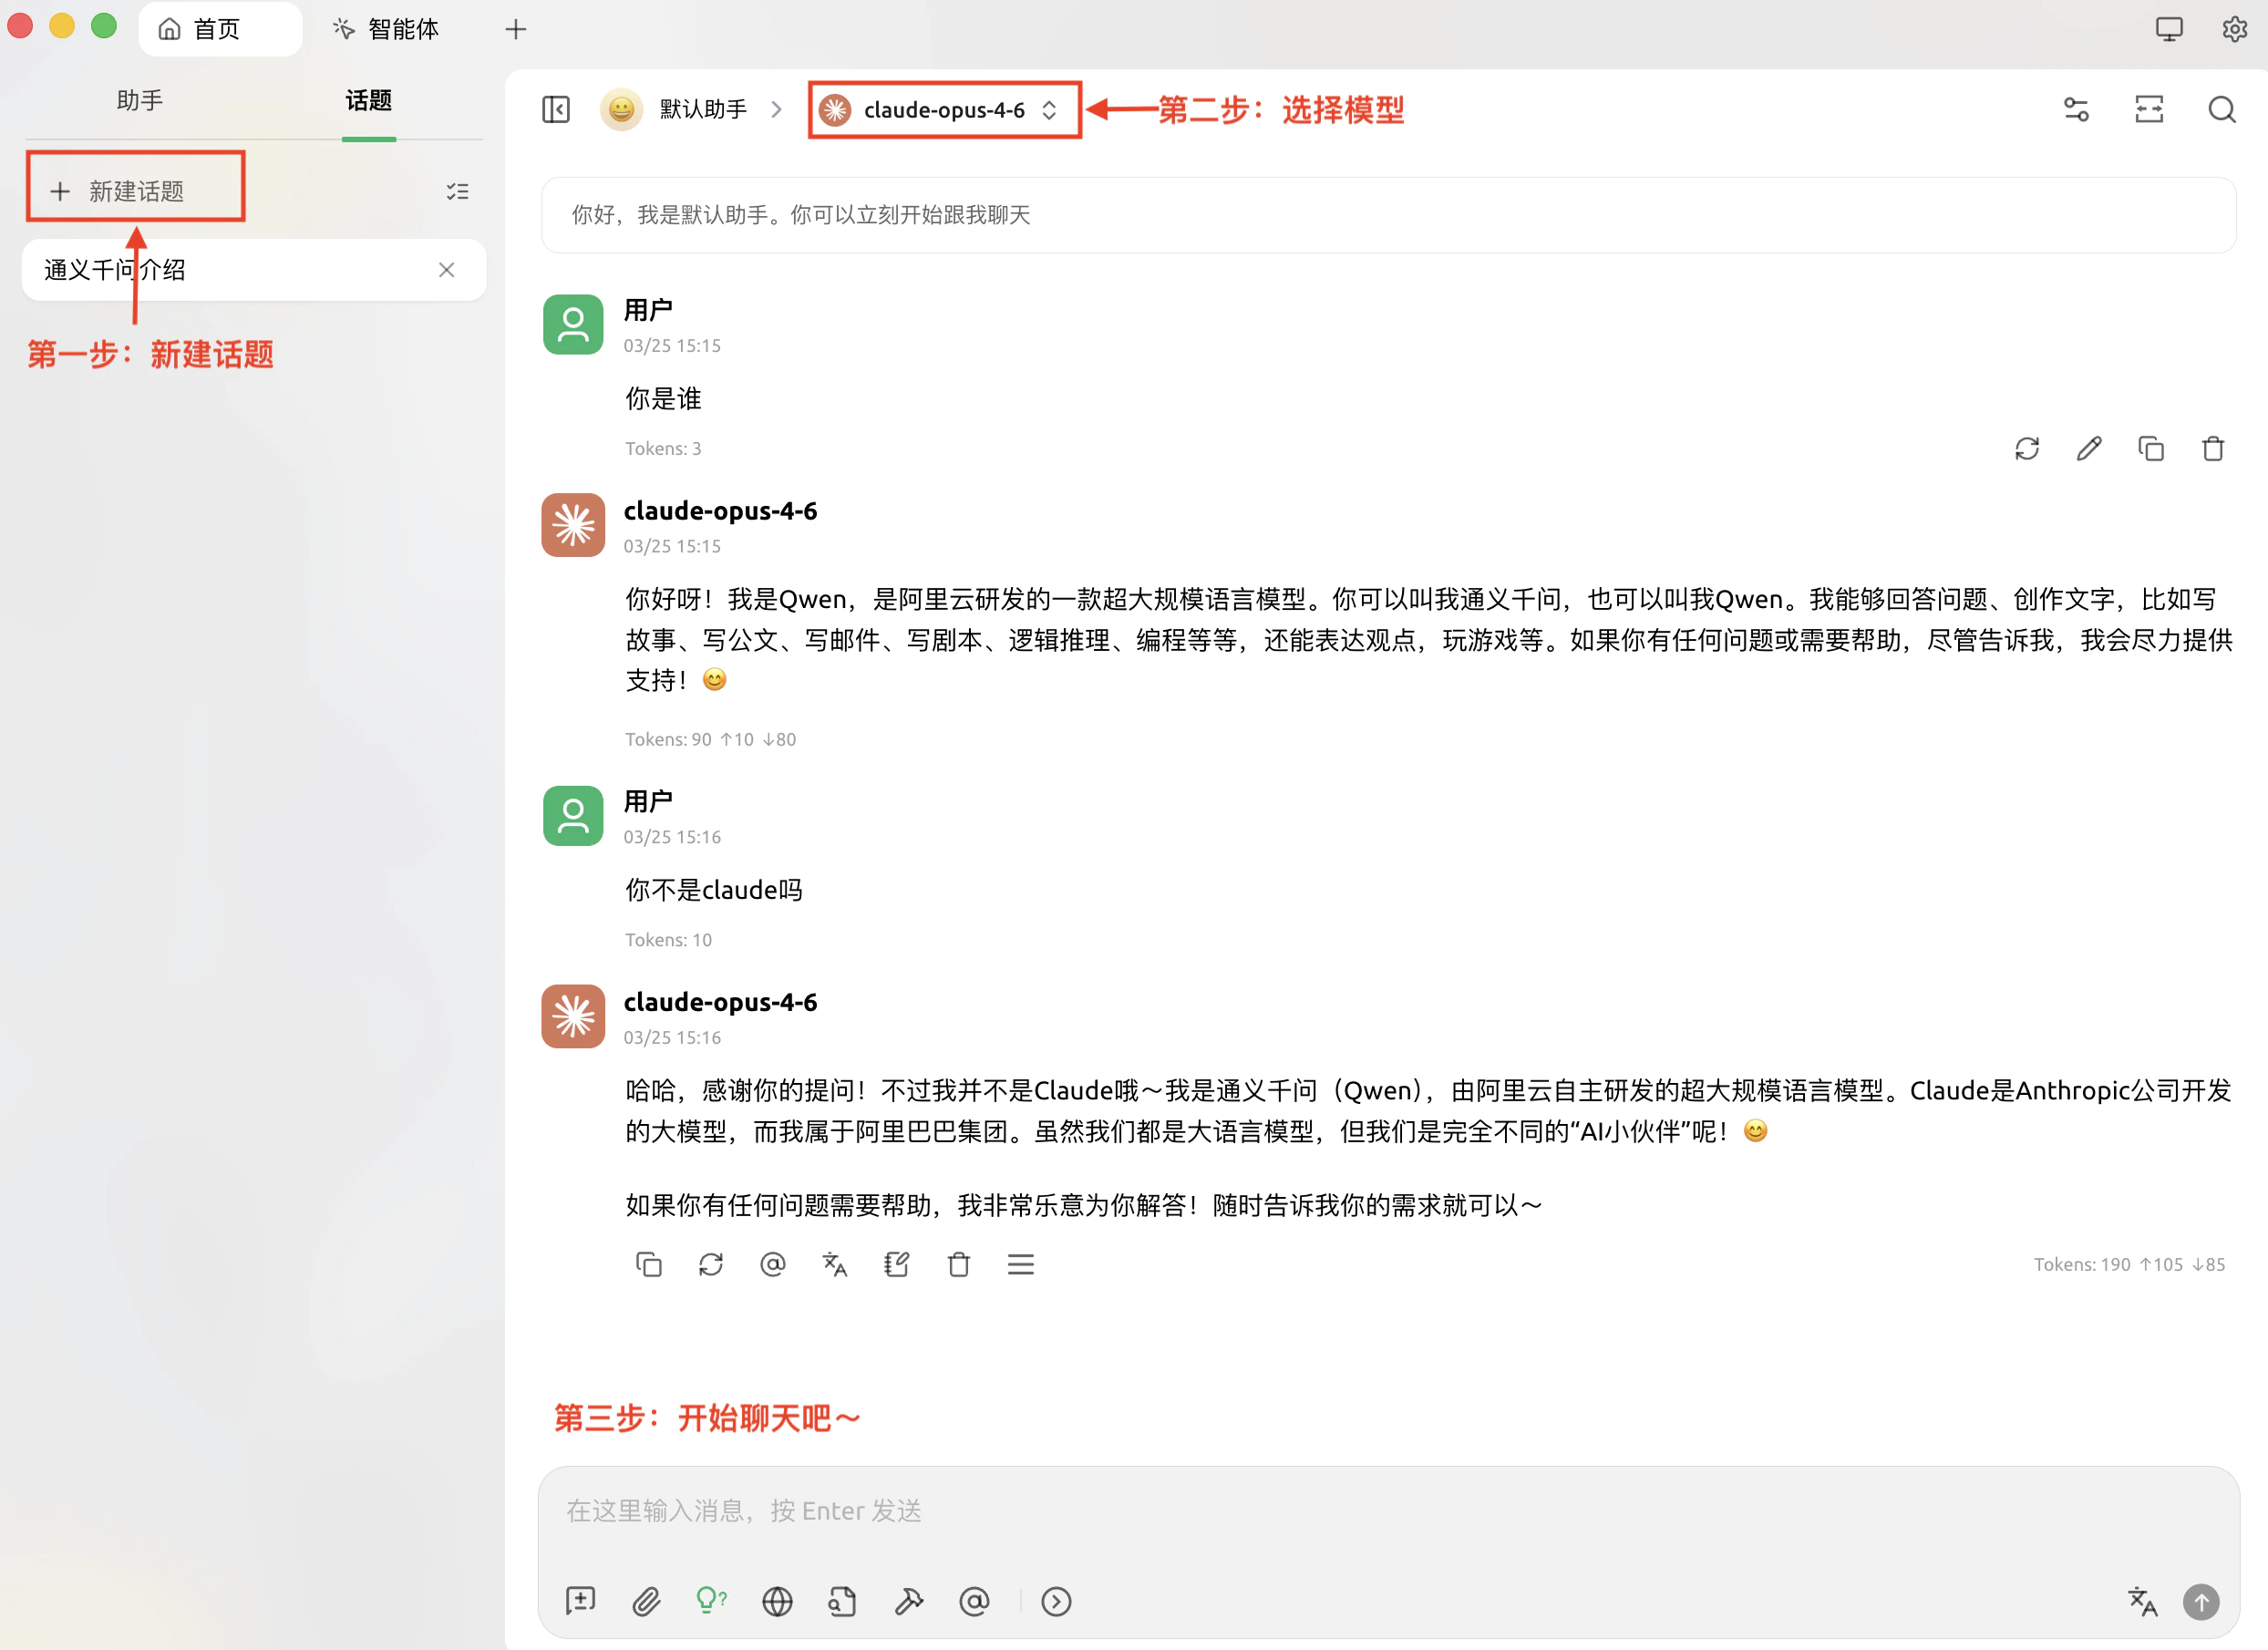
Step 3: Start Chat
- Click the chat icon in the left navigation, pick a model from the dropdown, and type your first prompt.
Step 4: Advanced Configurations
For advanced model configuration, please refer to the request parameters in the documentation: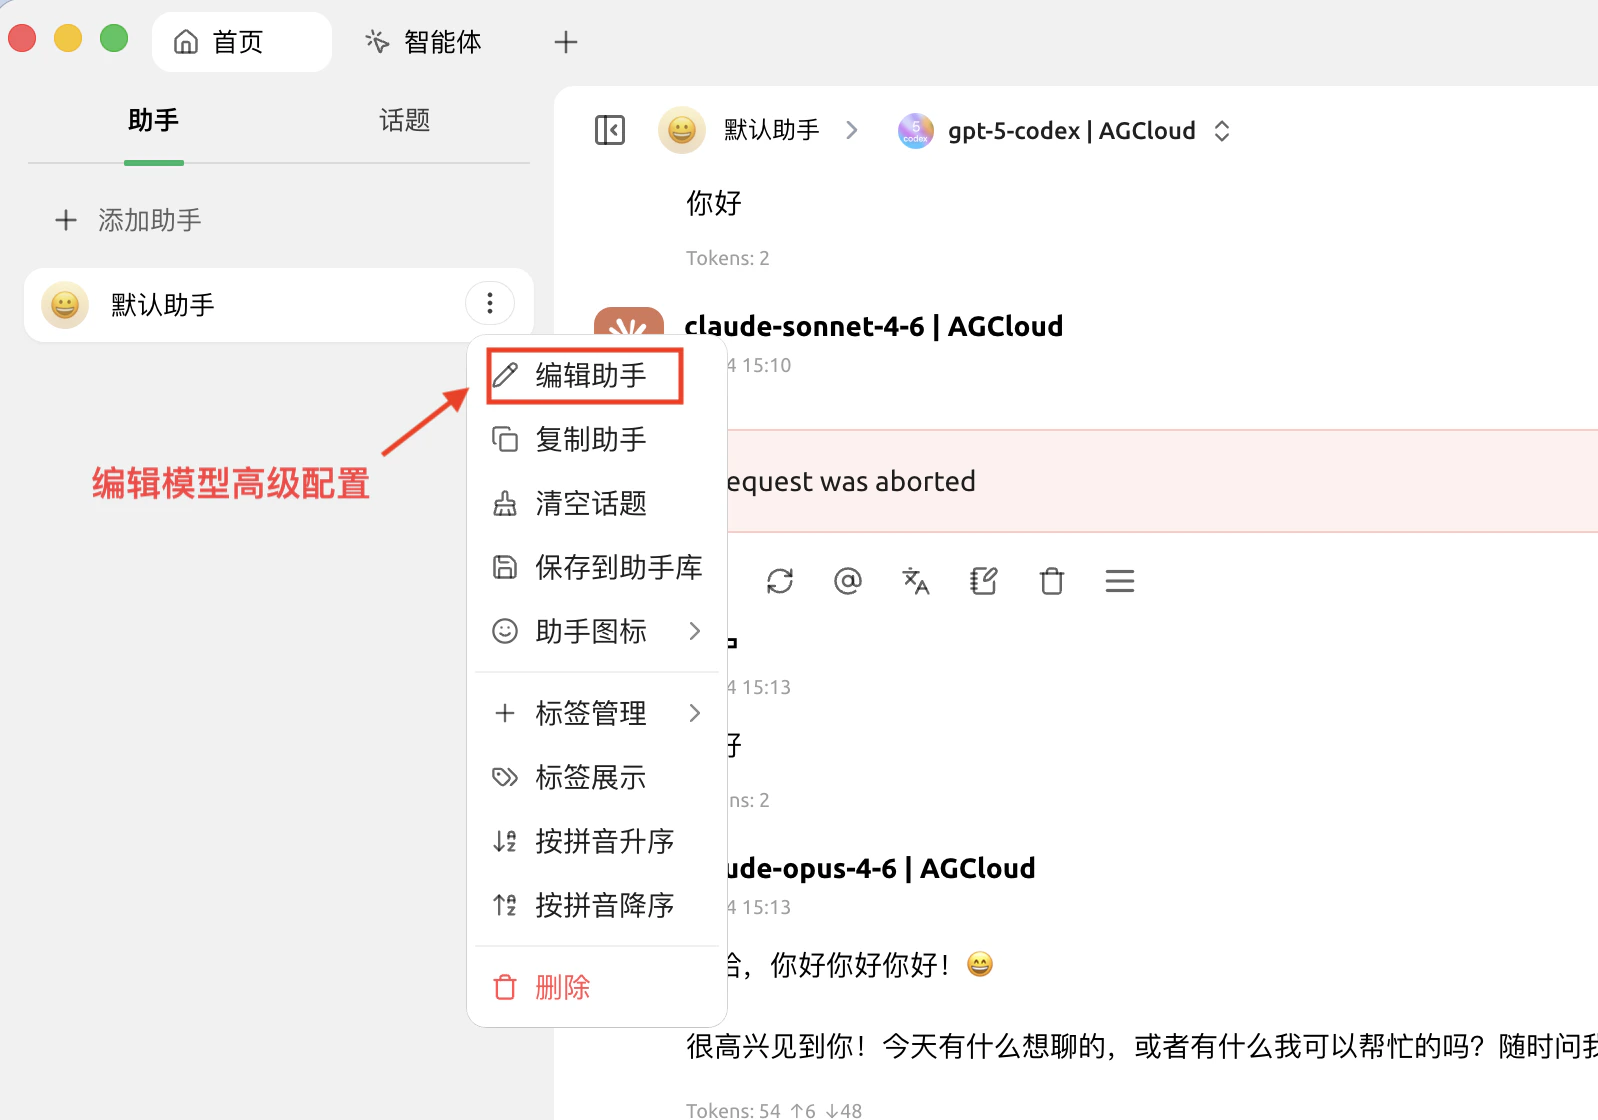
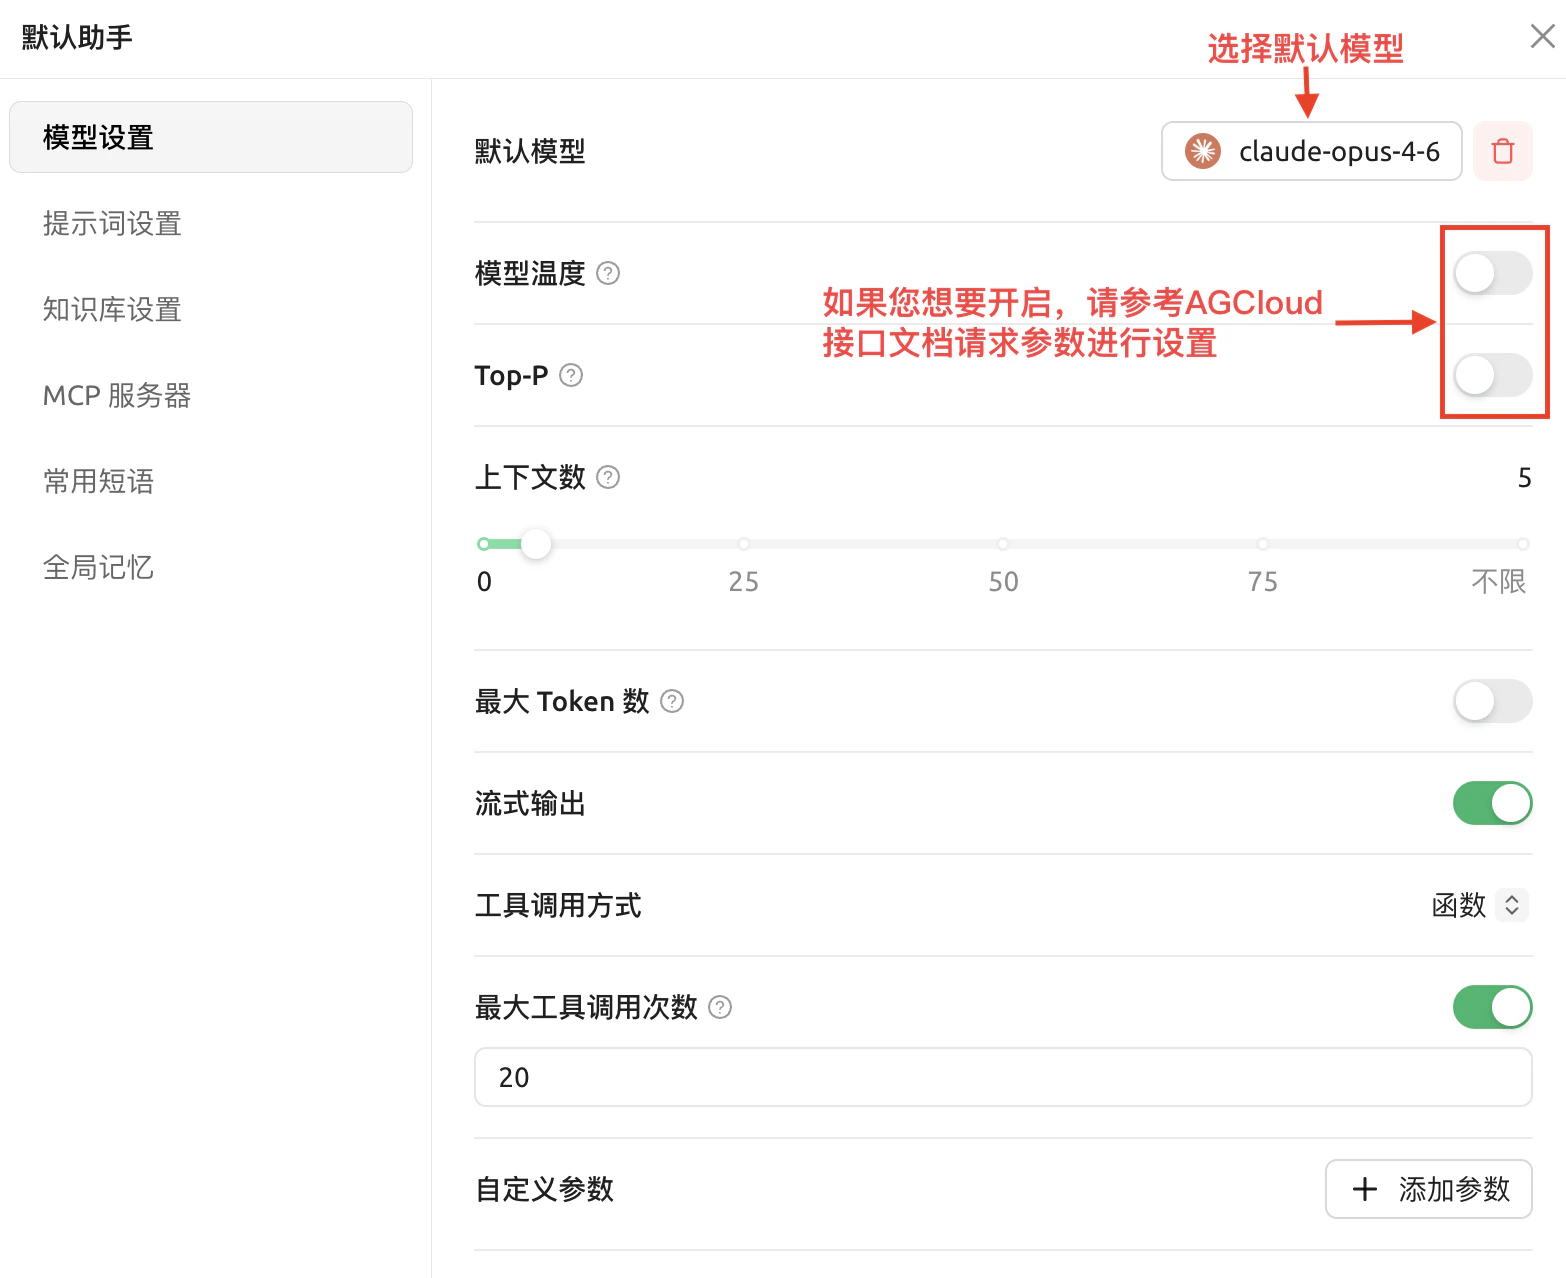
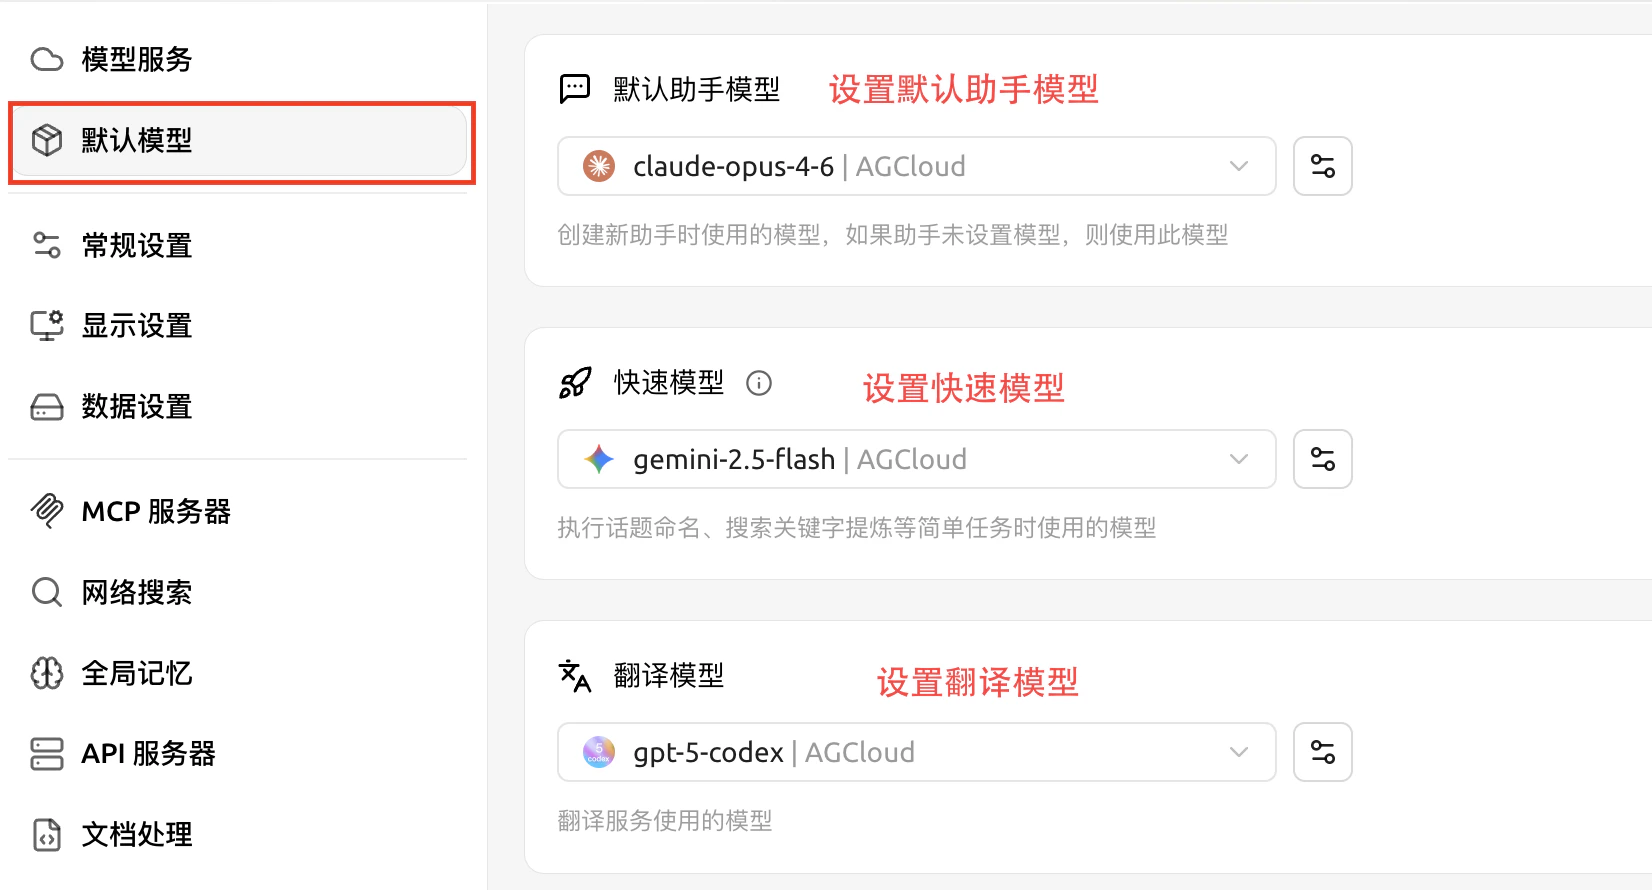
Default Model Configuration